This guide is to walk you though configuring CXi for Salesforce
Salesforce and/or the database used to store your contact data should already be configured and working correctly before proceeding with this integration.
Software Suite must also be installed already with the initial configuration completed. If this is not the case, please see the “Technical Installation Guide” or consult your system administrator.
Information You’ll Need
- Salesforce Client ID
Configuration
1. Adding the integration
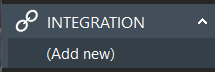
Right-click the Software Suite icon in the tray menu of your PC, and then left-click the “Configuration” option from the menu that pops up. This will open the “Configuration” screen. Under the heading “Integrations”, click the “Add new” button.

From the drop-down that appears, choose “Salesforce”, and then click the “Set” button.
2. Setting up the Integration
The integration configuration will now appear. Here, you can rename the integration in the top text box, if you would like. It is called “Salesforce” by default.
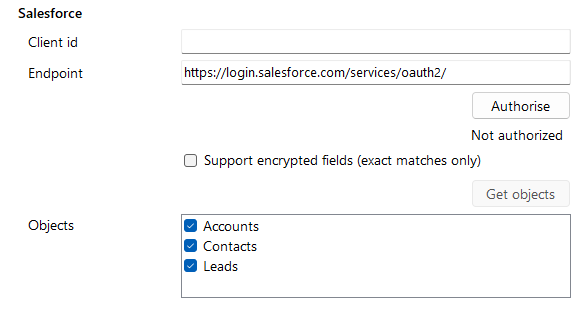
In the Client ID box, enter the Salesforce Consumer Key that you can retrieve from section 3 of this guide. Note, leave endpoint as it is.
Then press “Authorize” and enter your front end username and password.
Once logged in, the status should change to “Authorized”.
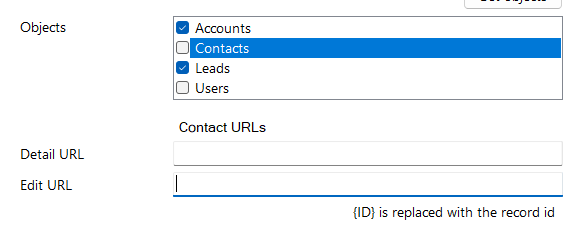
Press “Get Objects” to show you the categories of records in Salesforce that can be looked up in searches and popped. Select one or more of these categories by ticking the corresponding boxes to include them.
When you select an Object from the list, you can enter a Custom URL in the Detail URL and Edit URL box that appears, if applicable.
For information on Caching, Activity Logging or Testing the Integration, see the below sections of this add-in guide.
Press the “Save” button on the Integration Configuration.
3. OAuth Authentication
A Domain Name and “Connected App” must be configured or already exist in Salesforce. The following sections P1 – P3 describe the specific steps to fulfill the requirements for OAuth. Please read the following carefully as you may not need to follow each step. If you are unsure how to proceed, please consult with your Salesforce Administrator.
- If your Salesforce account has a domain, go straight to “P2”.
- If the Domain and Connected App already exist, you can verify this information in section “P3”.
P1) Creating a domain name in Salesforce
1. Log into your Salesforce account, and open the “Setup” menu. Search for “Domains” in the Quick Find Box, then select My Domains.
2. Enter the Domain Name you want to use, and press “check availability”, and then register.
3. Your domain should be emailed to you shortly after.
P2) Creating a connected app
1. In Salesforce Classic-Log into your Salesforce account, and open the “Setup” menu. Click on Build > Create > Apps, then at the bottom of the page, under “Connected Apps”, press “New”.
In Salesforce Lightning-Log into your Salesforce account, and open the “Setup” menu. In the quick find box, enter “App” and then select “App Manager”. Click “New Connected App”.
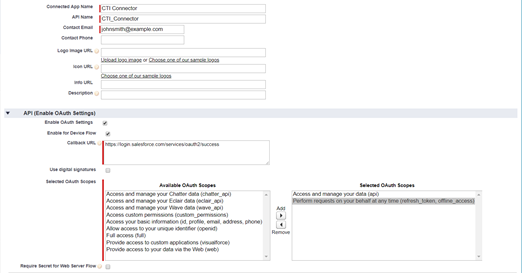
2. Enter a Connected App Name, API Name, and Email address for your app.
3. Tick the “Enable OAuth Settings” option.
4. Tick “Enable” for Device Flow.
5. Add Callback URL as: https://login.salesforce.com/services/oauth2/success
6. Under Available OAuth Scopes, bring over
“Manage user data via APIs (api)”
“Perform requests on your behalf at any time (refresh_token_offline_access)”
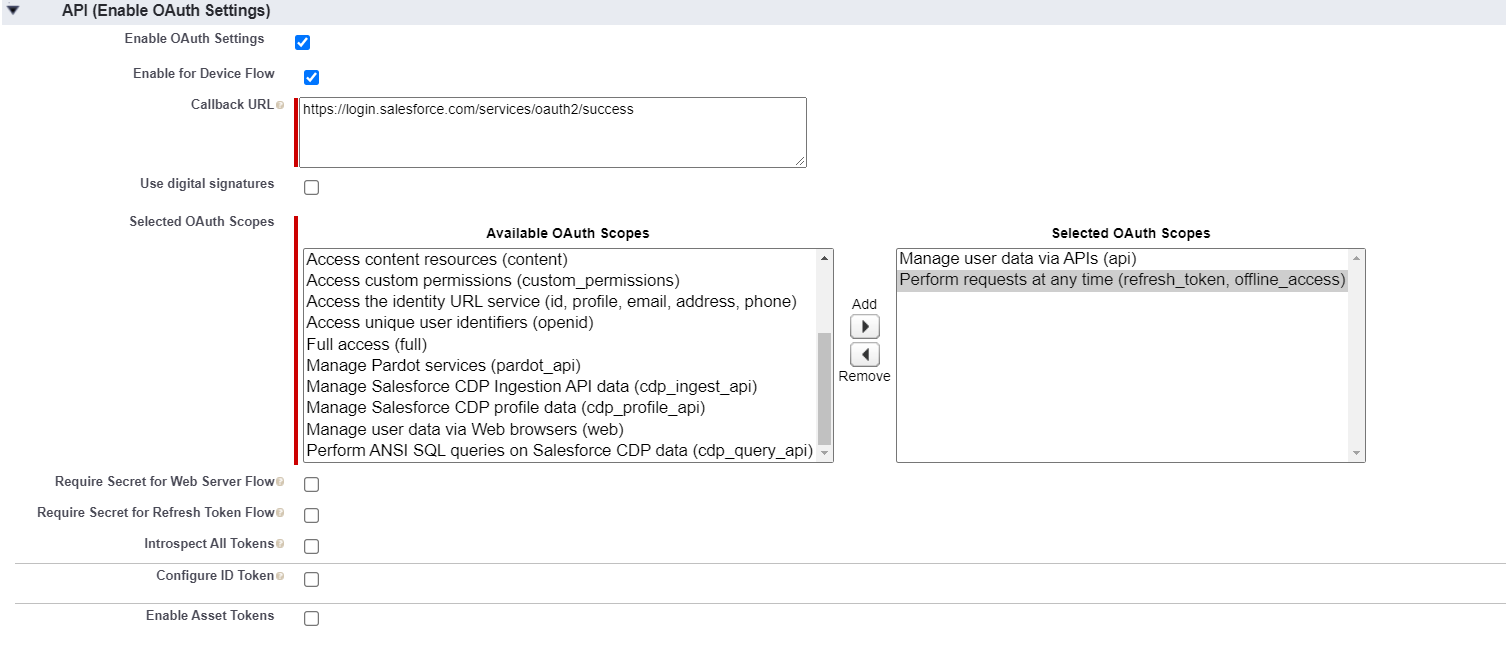
7. Uncheck “Require Secret for Web Server Flow” option.8. Uncheck “Require Secret for Refresh Token Flow”, if it is checked. This will stop the Connected App from “expiring” periodically, which can cause it to fail.
9. Uncheck: “Require Proof Key for Code Exchange (PKCE) Extension for Supported Authorization Flows”
10. Press save, followed by the Continue button.
11. You will now see the Connected App definition – make note of your “Consumer Key”.
Note: Allow from 2-10 minutes for your changes to take effect on the Salesforce.com server before using the connected app.
P3) Retrieving existing Consumer Keys (Client ID)
Existing Consumer Keys
1. In Salesforce Classic-Log into your Salesforce account, and open the “Setup” menu. Click on Build > Create > Apps, then at the bottom of the page, under “Connected Apps”, click on your Connected App.
In Salesforce Lightning-Log into your Salesforce account, and open the “Setup” menu. In the quick find box, enter “App” and then select “App Manager”. Find your app, and press the drop down arrow and then “view”.
2. Here you will see “Consumer Key” under “API (Enable OAuth Settings)” tab.
Now, on the Software Suite configuration, paste in your Client ID (Consumer Key). Press authorize.
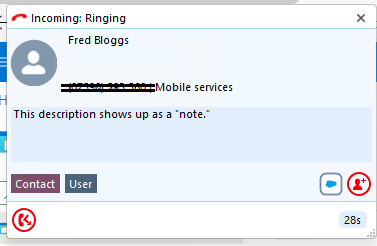
4. Call Preview Window Notes
The notes section in the Call Preview window retrieves the “Description” field of the contact. (See below)
Contact Details in Salesforce:

Preview showing notes:
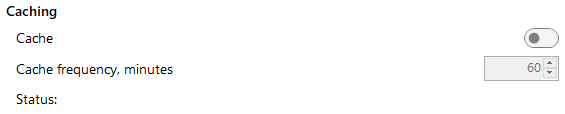
5. Caching the Integration
This add-in has the ability to cache the contact data (cached mode).
To enable caching, select the tick box next to “Cache”. You can set how often you want the integration to cache in the “Cache frequency, minutes” box.
6. Activities
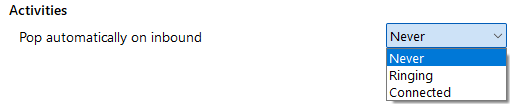
This integration can be individually configured to automatically pop matching contact entries on incoming calls, either during ringing (as soon as the call is presented) or when connected (after answering the call).
This option allows you to attach details of the call with the associated contact, either manually or automatically.
Under the heading “Activities”, enable “Create activity on call end” to automatically log the call activity to the contact in Salesforce when the phone call has terminated.
Enabling “Show activities on Call”, initiates a manual log of a call when it is in progress. When the caller’s number is recognized within Salesforce, this presents an additional button within the Preview Window. Pressing this button will open an activity / note taking window in Salesforce, pre-populated with important call details. In the event of a contact having the same phone number as another contact, no call event can be created. A user should use the screen pop icon to open the address book to see multiple results and click on the relevant entry. The user can then open a “new activity” for the respective contact using Salesforce directly.
It is advisable to only select one of the two options.
7. Related Data
This feature when enabled, allows you to open up a window called “Related Data” alongside the call preview window. You will be able to customise what extra information is present to you, to help you whilst you are on a telephone call.
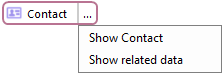
The “Related Data” window is available through the Preview Window, Call Toolbar, Address Book, etc. A contact with related data will display a drop down list against the contact. Click the drop-down button and then “Show related data” to open the related data window.
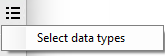
To customise which values are displayed, click on the menu button ![]() and then “Select data types”
and then “Select data types”

Customise which fields / entities you want to see within the related data window.
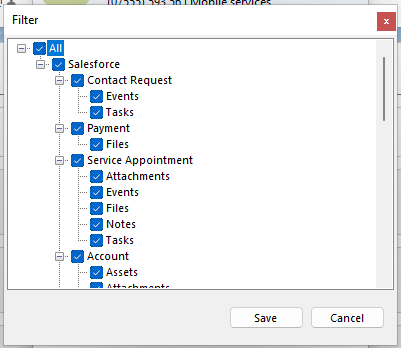
Then you can click Save.
8. Testing
You can test whether the integration works successfully through the integration configuration. Please note: For some integrations, the below testing features will not work fully. For a definite test of an integration, use the client address book or check the client logs.

Press the “Check” button next to “Check connection” to make sure the credentials you have entered above are correct.
You can search for a contact to further make sure the integration worked correctly by pressing the “Test” button next to “Test search”. Enter a phone number, and press search. If the test does not work, go to the “Log” page of configuration and see if there are any errors in the log.
Appendices
A1) Terms and Conditions
This Addin Guide page will assist you through configuration and basic use of the Software Suite Salesforce Add-in. It is expected that you are already familiar with the Address Book, Call History and Preview window, and the basic concepts of integration and screen popping using the Add-ins. See the “User Guide” for these topics.
Please note that the above addin or features may not be included in your version of the Software Suite. Contact your telephone system provider for further information.
For information on setting up dialing with Salesforce, please click here.
For a video demonstrating the integration, please click here.